
well, I have been working on the van for over a year now, but it is finally done.
here are some before photos:


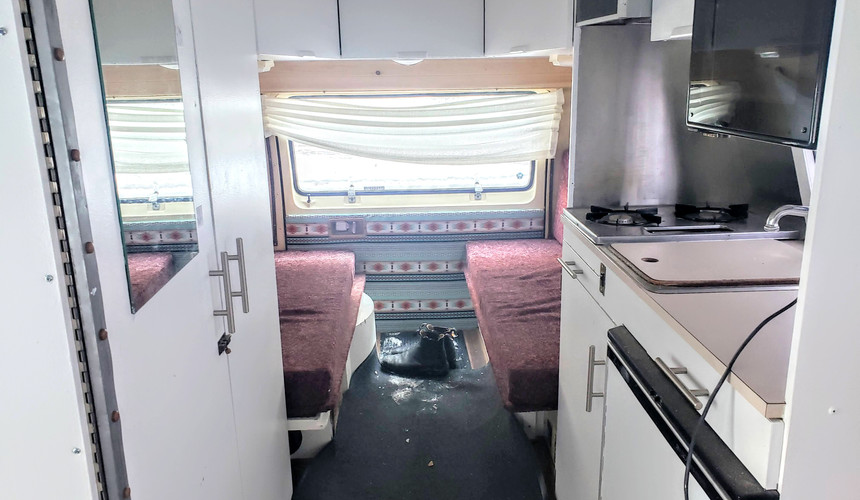
as you can see, pretty much everything was stock from roadtrek and very 80s and very brown
here are some photos of the finished product:

redid the floors, curtains, walls, painted everything white

built a couch in the living room instead of the passenger seats

tiled the kitchen, redid the countertops

built a second countertop on the passenger side

replaced an awful fluorescent light over the couch

put wood panelling in for the walls

put in a monitor for a tv, built another shelf for more storage

redid the carpeting, put in curtains to hide the storage

night mode - the back booth converts to a bed

more tiling

managed to sneak in a little climbing reference in the sink cover

some additional kitchen storage

in case you care, here is the process in great detail, step-by-step as documented artfully through a series of low quality snapchats and potato cell phone photos:


step 1:gutting
painting what walls and cabinets were left

had some help painting


the walls were all this awful fabric, underneath which was a sandy disintegrating foam that came off at great cost to our lungs


next step: wood panelling, major pain in the ass because nothing in a van is square or straight, got very acquainted with the scribe tool

lovely weather for working outside though
inaugural van beer

bought some vinyl floors, turned out to look just like the plywood underneath, that won't do


ripped that up and replaced it with laminate, starting to look more like home


next we had to get rid of the maroon upholstery on the doors, we also sewed new curtains to replace the 80s brown curtains
you can click here to skip this section if you are not interested in the minutiae of van electrical systems:
the roadtrek originally had an electric system designed for very minimal use outside of shore power (plugging it in): a 100ah lead acid marine battery (which would barely run the fridge for 5 hours), a 110v to 12v converter/charger which charges the house battery off of the shore power and powers the 12v appliances, and a circuit breaker integrated into the converter that ran the 110v (normal household) outlets throughout the van. while having a starting point was great, we wanted to add solar and covert the system to lithium because you can only use 50% of the power in a lead acid without damaging it, whereas lithium you can use ~90%. trying to integrate these two systems was not exactly simple.
the main issue was that lithium and lead acid batteries require different charging profiles and charging a lithium battery with a lead acid charger would damage it. in order to use any of the 110v outlets in the van, the shore power plug needed to be plugged into something, either a power hookup or to an inverter (which turns the 12v battery power into 110v). the problem being that when you plug the shore power in, it tries to charge the battery, which uses the wrong charging profile, and is also the battery charging itself through an inverter which is very inefficient and stupid, so we had to figure out a way around this.

the converter/charge controller/fuse box in question

i started with buying a renogy dc-dc charger controller which can charge a lithium or lead battery with both solar power and power coming from the alternator. we bought a renogy 170ah lithium battery, which in combination with a 100ah lead acid gave us 270ah total capacity. now that presented a problem being that the two different types of batteries cannot be connected to each other in any way because of their different voltages, so only one could be used at a time, so i had to figure out a way to isolate them

here is the rudimentary setup taking shape: both batteries, a victron smart battery monitor (so i can monitor battery levels and output by bluetooth), positive and negative bus bars (they join all the positive and negative ends), the renogy dc-dc charge controller, and a 700W inverter to change the 12v battery power to 110v for the shore power and appliances.

here is my solution to the two battery problem and the "wrong charge profile/battery charging itself problem": switches to control which battery is running into the system, and a switch that controls whether the positive lead from the house system/converter/charger connects to the battery.
after some experimenting, it turns out that if the shore power is not connected, the house system runs off the battery directly and powers all of the 12v appliances (lights, water pump, stereo), but none of the outlets work. if the shore power is connected, all of the appliances and outlets run off of the shore power. if you want to use the outlets, you can plug the shore power plug into the inverter and turn the battery positive switch off to keep the battery from charging itself. problem solved. now we needed to add the solar to actually charge the battery from something.

we bought 2x 200w renogy solar panels


we mounted the solar panels to the roof with vhb to avoid drilling, i wired them through the fan to avoid drilling. i later went back and reinforced the panels with steel wires as a backup in case the vhb were to fail

here is the final electrical system
the second battery and a lot of the mess of wires are buried under the floorboard. we have mostly been skipping the 110v outlets and running the shore power and instead just plugging laptops etc. directly into the inverter, it turns out a van is not very big and you don't need plugs all over the place.
here is a diagram in case that clarifies any of that:

hi! welcome back! back to the regular scheduled programming:


i really wanted a couch instead of passenger seats in the living room, but we wanted a couch that you could pull out to put your feet up on or convert into a bed if need be, so i built this system using 200lb drawer sliders from lee valley. underneath is a box that houses the electrical system and storage.

we bought a foam mattress for cushions, cut it to size

next we had to upholster the foam, we had barely enough fabric so we had to get creative


and all of the other cushions

finished couch
the maxxair was busted when we bought it, just needed some rewiring

a couple stitches from cutting a new stereo bracket with a knife like an idiot, replaced the stereo and the speakers

installed a couple of home ceiling speakers in the ceiling in the bedroom

there was still some shag carpet left in the front, that also had to go

new carpet blueprint
after months of searching and figuring that we were in for many hundreds of dollars for countertops, we found this brand new bamboo countertop at the great glebe garage sale for $20, nice, score


(slideshow) counter removal/installation
mid process we decided on the drop sink to increase the counterspace
jigsawing

we decided that counterspace>closet space, so the toilet closet on the left needed to go
yeet
some tricky jigsawing

we still needed a way to access the toilet underneath the counter, so we cut the counter and added hinges, i needed to build a shelf to go up top too

next came tiling the kitchen, adding a new tap

got the essentials sorted out

one more coat of paint now that everything is coming together

tidied up all the electrical

took me a whole year to realize i could just cut a 110v lamp and wire it into a 12v circuit if i just put a 12v bulb in, used this to replace an awful fluorescent light above the couch. i also built an acoustic guitar stand above the couch

the van originally had some sort of jerry rigged 1 5/8ths hitch welded into the frame, which isn't even a real hitch size, so we had to grind off the old one and replace it with a real hitch to bring the bike

and that is pretty much it!
thanks for reading!
if you want to follow along when we leave in january, please subscribe below!
Holy sh**! Genius. Bravo
Chris P
What a ton of work. But based on my own experience with our van, the "work" is never completed because you always find something else that needs upgrading. It's an addiction. Good choice of bike, by the way.
Great vision - and tons of work! I hope you really enjoy your extended trip. You guys are amazing!
Awesome transformation and that electrical system, over the top. Looks great, you guys did a wonderful restoration. Look forward to the updates from the trip.